Monday, April 25, 2016

Increasing my Skills with Sarah Veblen

This is my story of how I came to work with Sarah Veblen and all the things she has to offer and I think it's one great story.
Wendy Grossman, Myself, Sarah Veblen

It's always a good time to skill up!
Increasing my skills in sewing is an ongoing process and one that is constantly evolving!

I have been sewing for many years! For the past 25 years I have been sewing on a regular basis and have had many opportunities to continue my education. I strive to continue to better my skills on a regular basis. Of course, much of becoming a better at anything we do just involves lots and lots of good practice!

One of the problems that I have been experiencing over the past several years is that many of the expos, local classes, retreats and such just don't offer enough beyond the basics or can be very project oriented. I found that I have had to look harder to find more challenging learning opportunities where I feel like I am getting a good return on investment. This has led me to really digging deep and finding teachers/mentors that can provide these more advanced skills. 

I must say that I completely understand why, from a business sense, that there are many more beginner and intermediate classes and workshops available. This group comprises the biggest population of home sewers and therefore generates the most revenue. This is also why there are so few advanced things available and why they cost you more. Pure economics. 

I had taken some lecture/demo classes with Sarah before at The Original Sewing and Quilt expo's when they come to Chicago. They were very good but they were only the very teeny tiny tip of the iceberg. When I looked into her more, at that time the majority of her longer workshops were being held in her home studio and I was nervous to spend that much money on a relative unknown to me entity. 

Fast forward a couple years and one day (while perusing the blogoshpere) I happened to see that Susan Khalje was going to be in Chicago for a one day small hands-on class lecture/demo informal gathering with Rhonda Buss at Soutache. I signed up immediately! I was seeking to find a group of like minded sewing individuals in the Chicago area and chances were good that I could make some connections here and I was so right about that! While at this one day class, I met Wendy Grossman. we started chatting and by the end of the day she mentioned that Sarah Veblen was going to be coming to Chicago for a Jacket Workshop. This was great news! Especially since on further investigation, I learned that I did not have to be working on a specific jacket. This was a class for me to learn advanced techniques and to apply them to what I wanted to work on. 

This first Sarah Veblen Jacket workshop was such an eye opener to me! We were having discussions about things not just being lectured to. AND we were in a wonderful small group settings where we learning not just from Sarah but from each other and from our shared experiences. It was an amazing experience. When I reflect upon this I think it may just have been because I was ready to have this experience, yearning for it and actively seeking it out.
I gained much more than just the techniques that I learned in that workshop. I have gained some very wonderful and meaningful relationships as well. 

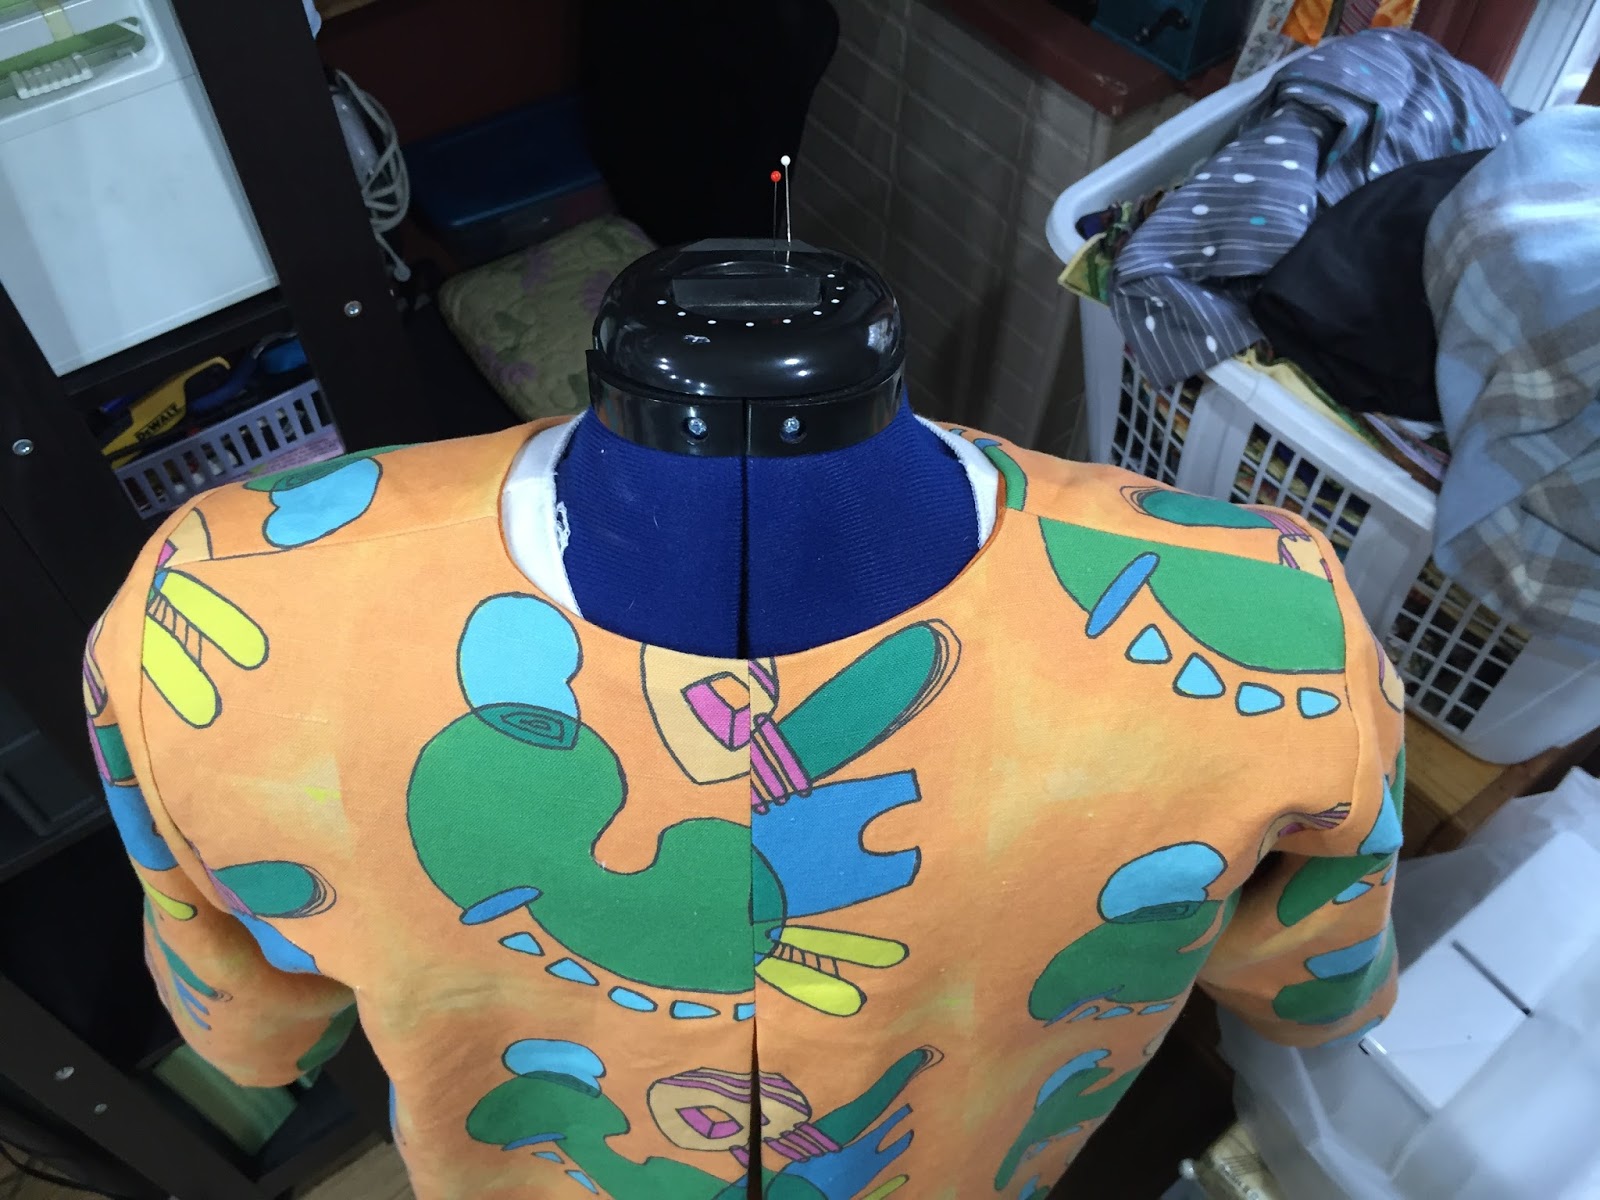
I have found that Sarah's teaching style suits me perfectly! It matches up with my learning style quite nicely and I am able to get the most out of it. One of things that I most cherish when working with Sarah is that she offers the entire package. Sewing and construction techniques, fitting as well as design and style. She takes the time to get these things done properly but offers up time saving techniques, aka shortcuts when appropriate.The fitting process she uses is methodical and i believe, easy to understand. I have found the more that I apply her fitting techniques and processes the easier they become and the better I am now able to fit myself! Of course having her fitting book on hand helps as well!
Super lucky for me that Sarah Veblen has developed a Chicago following and comes several times a year to offer local workshops. One of my favorites is the 'You choose your focus' workshop. You can work on anything you want!! Fitting muslins, specific techniques, design process, a works in progress, a specialty garment, etc, etc. The thing that's fun about these is that you start of the workshop with a group discussion as to what everyone is working on or wants to work on. This way if someone else is doing something you are interested in then you have the opportunity to gather around and learn that as well. If there is something you are not interested in you just keep plugging away on your own stuff.  

I believe that one of the biggest barriers to learning can be a trust issue. Trust in yourself, trust in your skills and trust in the person teaching you. To overcome these you have to be willing to work with a mentor/teacher/educator/professional whom you make a good connection. Once you have that connection you can push yourself beyond your current boundaries and grow! It is an empowering feeling and one that sends your creativity soaring. It's not always easy and there is hard work involved but the rewards are wonderful. 

I have developed a great mentor relationship with Sarah that has taken my skills farther and faster than I could have imagined. What exactly does this mentorship mean to me? I am sure that it means different things to different people, in fact I know it does! 

To me, this mentor relationship means that I can feel confident in knowing that I have someone that I can work with when needed. I keep a notebook specifically for my mentorship and in this case it is my Super Sarah Notebook!  I jot down questions and thoughts about ideas that I want to discuss and when I have a bunch of those built up I schedule a skype session with Sarah. I average a 45 minute skype session about every 6 weeks or so depending on what I have going on. This also helps keeps me on track with projects. 
In a typical skype session I usually have a muslin or 2 in progress that I may have a question about in fitting. I usually have a fabric that I want to discuss and how I want to use it in a project and just run past underlining and interfacing techniques.Sometimes I have a construction question or specific sewing technique that I want to ask about. I also always prepare for these skype sessions by having all my materials at hand, having good lighting, and for specific questions I usually have done some homework first on different ideas. 

Working with Sarah Veblen is easy! She has made herself available across several outlets. If you are not ready for a one on one approach or are just interested a bit more about what she has to offer from what I've said here you can find plenty of opportunities to expose yourself to her teaching style.

Classes offererd through Patternreview.com Sarah offers quite a collection of online classes.Some are full video and some are a combination of video and PDF and some are just PDF. All of them are accompanied by chat room (classroom)  access. I have the pattern work, All About buttons and buttonholes and 10 clever techniques video classes. I think my current favorite of these is the Pattern work class. I have watched it multiple times and each time I pick up something new! I have also taken the Understanding Wool Fabrics, Understanding Knits, More Knits and Sewing Facings and Developing facings patterns classes. I have not been disappointed in any!

Master Classes offered through Taunton Online Workshops. These online workshops are also offered as DVD's through the Taunton store. These classes are excellent! I prefer the DVD's but just because i'm not a big fan of how Taunton runs their online workshops. The material is exactly the same form the online workshop versus the DVD's.There are both a bodice and skirt set. Each one include creating a master pattern for either a bodice or skirt and then the second class/DVD is creating different styles from that master bodice or skirt pattern.

Sarah also has a wonderful fitting book, The complete Photo Guide to Perfect Fitting. This is hands down my most used fitting resource in my sewing library. (and I have quite a few!!) Sarah often makes time for personal fitting sessions when she comes to Chicago. These are very well worth the time and money. According to my very good friend Wendy Grossman, Sarah is a fitting Goddess! and she really is. Having a well fitting garment is worth gold!

As I mentioned above she is available for Skype/facetime sessions for one on one learning opportunities. I really like these. I must admit that I was a little skeptical at first at how effective they could be probably because it was something new for me. I have plenty of experience with work and using skype for meetings. Usually this is more computer based learning and discussions not so much a face to face environment.This type of learning is great for me. I love to be able to ask my questions and have excellent discussions with a very knowledgeable person.

My favorite are the in person workshops! There is a regular schedule of these workshops on her website Sarah Veblen Clothing Originals under the Teaching Tab. If you have the opportunity to attend one of her classes or workshops I would highly recommend it.

I will be attending her Design 1 course next month and am very excited about the class. A full blog post review will be forthcoming.

Clearly we are lucky to be living in a time that offers us so many many ways to learn!
So if you are looking to 'skill up' you really have nothing to hold you back
Books
Workshops
One on one sessions
Skype/FaceTime 
Email
Online classes
Blogs
DVD's 
Periscope
YouTube videos

Who is your favorite sewing professional to learn from?

Happy Sewing!
Princess Victoria taking a walk with Grandpa! I can't believe this tiny peanut is 22 months old!


Wednesday, April 20, 2016

iART Jacket, Silk Culottes and matching Tank: a work of Collaboration!

iART Jacket and Silk Culottes and tank on the runway
My Inspiration for this jacket came from some of my sisters art work. We have often talked about doing some sort of collaboration together, we just hadn't been able to solidify any ideas. Earlier in the year there was a Haute Couture club of Chicago meeting that was all about designing your own fabric and various fabric printing services that were available. The lightbulb in my head went off immediately! Here was something my sister and I could do together. When my sister came up for the Christmas holidays she brought with her a slew of her favorite drawings that she had done. Some were just line drawings and some had been colored in. Together we went through about 40 small drawings and I picked the ones I liked best and scanned them into my computer so that I could have them to play with. I was instantly attracted to the bright colors and knew that for this project I wanted something big, bold and bright!
my sister and artist, Jennifer Torres

Cloud series- works in progress

Cloud Series at Installation

After scanning and playing  with the images on the computer for a while I decided to use Spoonflower to have my fabric printed. I uploaded several of my images and using their software I played with the scale and the repeat of the design. As you can see on my jacket, I really went for big and bold! I used a half drop vertical repeat, this looked most pleasing to my eye. I took a deep breath and ordered 3 yards of the linen/cotton canvas. I was so excited when it arrived!!! My husband had this part comical, part skeptical look on his face like 'what the heck are you going to do with that??' Well, I did something fantastic with it! 

The fabric was quite stiff. Stiffer than I had expected. However I washed and dried it in the dryer about 4 times and it finally softened up. On the down side it also shrank right up as well! I lost about a third of a yard in length from 3 yards. Yikes!!!
Drawings done by Jennifer Torres- Bottom left was used for designing of this fabric


I had 2 contenders for the jacket pattern. A OOP Vogue Marcy Tilton Jacket and the Counterpoints jacket pattern by Gail Yellen of Gail Patrice Designs. I decided, with some valuable feedback, to use the counter points jacket. I already had made both previously so I was able to put them on and see how they would affect the overall silhouette. Counterpoints was the better option for this garment. 

With the limited fabric and the large scale print I really had to be careful in my pattern matching.  If I use this fabric from Spoonflower again in the future I will make sure to purchase extra fabric. I think part of it was also that seeing the pattern on the screen versus in person was slightly different. Not a bad different at all, just different. 
Matched pattern as carefully as possible across the front and back.


I very carefully matched the pattern across the front upper chest where the neckline meets as well as the center back across the pleat. I did limited matching at the side seams. This was mostly to make sure the repeats were inline with each other. I also did a lot of testing and playing with several different ideas and print placements. I knew for sure that I did not want one of those big bold prints right on a boob. I mean how bad would that look!?
I also knew that I wanted the print placed down the center of each sleeve for symmetry purposes. I am really happy with the outcome. Reminds me that it just takes a few minutes to step back and really think about the fabric and the print that you are using to come up with a pleasing and effective arrangement. 
decisions, decisions... long or 3/4 length sleeves?
I went with 3/4 length

in-seam pocket

matching print across front

back pleat detail

back pleat detail


inside out!

The lining is an orange silk lightweight twill that had been in my fabric collection for many, many years. It matched perfectly and I was happy to use it on a great project. For the inside top of the pleat I used a little piece of embroidered ribbon with dogs on it that I purchased from Soutache in Chicago. Having just lost my best furry pal ever it made me feel good to have it there. 

Several changes were made to the pattern so that it would suit my vision perfectly! The first was that I rounded off the points. The print on the jacket is full of soft and undulating curves and to have these sharp front jacket points seemed out of place. I used a teacup and just drew around the base and rounded off the corners quite nicely.

The second was that I shortened and slightly narrowed the sleeves. I wanted this to be a fun, fresh spring jacket and the shorter 3/4 length sleeves fit the bill exactly.

rounded off the points

The third change I made was to use a hidden snap for the closure. The fabric and the print is the real star of this jacket and I did not want anything to take away from it. I had auditioned several vintage buttons but in the end the snap just won out. I think it may also have to do with where this single closure falls on my body and I just don't like it. It's right exactly between my boobs. I tried moving it up but then the V was too high and lower just didn't look right either! So hidden snap it was. This darn snap took me several try's to get it in the right place correctly. The first time I somehow lined it up wrong and my matching was off about half an inch. The second time was matching perfectly BUT I sewed the damn thing on upside down so no snapping was happening! Double ugh. Third time was the charm and it lined up great.
used a hidden snap

The last change I made was to eliminate the bias binding. I tested several out but each time I thought ugh it's just breaking up that print across my chest too much! And darn it, I worked really hard on matching that up perfectly. So I trimmed all along the lining edges a quarter of an inch and sewed the lining to the edge right sides together leaving a 4 inch opening at the side bottom. Trimming the quarter of an inch allowed for the favoring of the print fabric when turned right side out. I then slipped stitched the opening closed and slipped stitched the sleeve hems as well.

lined to edge
Now for the rest of the outfit! I made green silk 4-ply culottes and matching Tank from silk that I also had in my fabric collection. Not quite as old as the orange silk, but still a couple years old.
I used two pants patterns, Eureka! pants that fit by Fit for Art patterns and Butterick 6178. For the pants I basically used the crotch, hips, waist from my my Eureka! Pants pattern and then Butterick 6178 for the legs. I would have drafted the legs myself but I happened to have this pattern in my collection so I just used it. Saved me a bit of time! These legs are really, really wide. More like a split skirt then traditional culottes. I made these up in a poly crepe first as a muslin and decided to add more width to the legs to make it more skirt like. I loved the effect it has when walking and they do feel very dreamlike when wearing. So light and airy. The lining is a lime green China silk that I ordered from Mood on sale.
I used a lapped zipper application for the center back zipper. I was planning to do an invisible zipper but just could not find a good enough color match for what I wanted. Lapped zippers in the center back of pants always make me feel more secure anyway ;-)


top and pants

back zipper detail


lining in a lime green china silk

The Tank is self designed from my own master top pattern. I think this top may have originally started as  Silhouette pattern many, many years ago. It has since gone through many fitting and design alterations to make it all me.  This time I made a wide scoop. I started by drawing out a square neckline but rounded it off because I wanted it softer looking for this project. Same reason why I rounded the points on the jacket. Out of all three pieces this gave me the biggest trouble!! I took the time to make self faced facings but when I applied them it was just too bulky and showed right through to the right side. So ugly that I could not even take a picture! I very carefully took those out and decided instead to do a wide bias facing out of the lime green China silk with multiple rows of top stitching. Let me tell you, multiple rows of top stitching on a spongy 4-ply silk crepe is a bitch to do! Especially around curving necklines and armholes. It got done, it's not perfect but oh well! You don't even see the tank when worn with the jacket anyway! 

topstitching detail on tank

bias binding in lime green china silk


This was my first of three garments worn at the Haute Couture Club of Chicago 2016 Fashion Show. The photographer did an excellent job in capturing how great I feel in this outfit. It makes me feel alive and happy! 
garments tagged and hanging in the model staging room

action shot on the runway!

Professional photos done by Peter Thompson

I love this look!

Happy Sewing!!

Friday, April 15, 2016

My Haute Couture Club of Chicago Fashion Show garments!

This past Sunday I participated in the Haute Couture Club of Chicago's 2016 Annual fashion show, The Art of Fashion.


on the runway!

This is my first year as a member of the Haute Couture Club of Chicago and I plan on staying a member for a very long time. It is a great diverse group of designers, sewers, seamstresses, sewists, bloggers and people who just love to sew from every walk of life from all over the Chicagoland area. There are even several out of state members. You can learn more about the HCCC on the website, hautecoutureclubchicago.com


I entered 3 garments or outfits in the show this year. This was only my second fashion show and boy was it exciting! I woke up Sunday morning with butterflies in my stomach! The venue, The Burnham Ballroom in the JW Marriott, Chicago, was simply gorgeous and made an amazing setting to hold the fashion show. The runway ran almost the entire length of the runway with a professional photographer at the far end. I was feeling blessed that I was onsite early and asked if I could help the photographer out with testing. This gave me a chance to get comfortable up on that runway. Although, once the room filled with almost 220 attendees those butterflies did a back flip!


Through my day job, I am very comfortable speaking in front of an audience but this was slightly different. I wasn't talking, just walking and trying to remember to walk slowly, purposefully and with a smile. A real smile not a forced smile that makes your face hurt. By the time I got to my third garment it was old hat and I was really enjoying myself!

My first garment was in the iArtist section, Fashions from member-created textiles, and was a graphic jacket, silk culottes and tank top. This was a super fun project to work on! I loved collaborating with my sister and artist Jen Torres. Here is the excerpt from the program:
Stephanie King designed her fabric to incorporate the shapes of sculptures created by her artist sister, Jennifer Torres. She had Spoonflower print the design on a cotton/linen blend canvas. Working withe the Counter-Points Jacket pattern by Gail Patrice Designs, which features a back pleat, Stephanie placed the pattern Motifs strategically to maximize the graphic effect. She lined the jacket in orange silk. Her culottes are a combination of Butterick pattern 6178 and Eureka! Pants that Fit, made with green 4-ply silk crepe lined in lime silk.


My inspiration!

I plan on a full blog post just for this bright, fun and funky outfit. Stay tuned!!


My second garment to walk the runway was my French Jacket and Pleather Fringe Skirt. You know all about the french jacket already! See previous posts here. The pleather fringe skirt was so much fun to make and wear. This outfit was entered in the Third Dimension section which was a challenge to incorporate techniques that give texture and added dimension to garments. Here is the excerpt from the program:

Stephanie King met the challenge with a mixture of surface textures. Her inspiration and point of departure was a fun textile made of pleather fringe on a mesh backing discovered at Fishman Fabrics. Steph draped the skirt and sewed portions of the fringe by hand to hide the seams. For a pop of color, she lined the skirt in fuchsia stretch charmeuse. Steph made her black tweed French-style jacket from the classic Vogue 7975 with a modified neckline and she incorporated traditional three-piece sleeves. She used the fabric's selvage as an embellishment, along with authentic Chanel trim purchased from Susan Khaljie, and vintage Jablonex glass buttons. The lining in a vibrant silk print of fuchsia, red, rust and black.


Fuchsia stretch silk charmeuse lining.

wide ponte waistband with 2 inch elastic.

My pleather fringe skirt was actually fairly easy to work with. It just required a little thinking and careful construction. I cut the textile on what would be the cross grain due to the direction of the fringe. This meant i used the selvage as the hem. (if you can even consider it a selvage!) the waist is a wide piece of black ponte knit with 2 inch wide elastic. Luckily enough the pleather fringe was soft enough to gather nicely into an elastic waistband. This meant I did not have to deal with any darts or zippers. I made a muslin of the skirt out of a black ponte cut cross grain. this simulated the properties of the textile almost perfectly. Once I had this designed how I wanted I cut this apart and used it as pattern pieces for the pleather fringe. Worked perfectly! The hardest part was hiding the single center back seam and the area around the shaped waist. I had plenty extra pleather fringe so I was able to cut small pieces of fringe and hand sew them over the seam area as well as in the area of shaping at the waist to fill in any blank spots.

hidden center back seam!
seam hidden under individually hand sewn pieces of fringe.
My last garment in the fashion show was my YSL Mondrian inspired dress. This was entered into a segment called Modernize Mondrian with Your YSL- A challenge to produce a modern take on the famous Mondrian YSL dress.


Out of my three garments this is my least favorite and for only one reason. I have lost 40 pounds since I made this dress in the fall and it just looks way too big on me. Due to the construction methods it is almost impossible to alter, probably easier to make an entire new dress!On with the show... you can see my original blog post on this garment here.
Here is the excerpt from the program:
Stephanie King used a modern fabrication- Ponte Knit- in an array of fall colors for her interpretation of the Mondrian/YSL dress. She updated the design further by making the self fabric flat piping grid lines much narrower than the original. She worked to stay true to the original silhouette while making sure the fit and shape are appropriate for a plus size. Construction called for some innovation when dealing with as many as eight layers of fabric at adjoining seams.
My dear friends Wendy Grossman, myself and Sarah Veblen.

I had a fantastic experience at this fashion show. Having my daughter and my friends there to support me was fantastic and being surrounded by an amazing group of talented and like minded fashion lovers was just superb!

My amazing and supportive family and friends!!
Melissa Janowicz (my daughter), myself, Krystal and Emily.
 Until next time!! Happy Sewing :)


Monday, April 11, 2016

Wearable Art at the International Quilt Festival-Chicago

Last week I had the opportunity to spend a couple hours at the International Quilt Festival in Chicago at the Rosemont Convention center.

This expo offers classes, seminars, make it and take its as well as an amazing display of quilts and a vendor shopping area.

I'm not a quilter. I dabble here and there in quilting but that is it. Even though garment sewing is my passion I can appreciate the work that these quilters have invested in their works of art. The amount of time, the attention to detail, the planning and the passion that is infused in these quilts is quite evident.

In this years showcase there was an area dedicated to garments. These garments were all in an exhibit called Fashion Flashback. This was a nice surprise for me! These were what I would call wearable art and delightful to look upon! Many of them incorporated traditional quilt techniques to make portions of the garments and many of them are heavily quilted as well as pieced and appliqued. As you can see in the photos below these mostly border in the fantasy realm and must have been quite enjoyable to create. Several of course look like a quilt made into a piece of clothing and while an incredible amount of skill and work were employed in their creation, they simply are not to my taste. I would prefer them on my bed or keeping my lap warm on a cold evening.


The dress on the left was created by a local designer, Eve Kovacs. Always nice to see locals in a large expo.


I believe this jacket and pants ensemble are beautiful and quite wearable for the everyday.


This was the most whimsical of the bunch!


This was one of my favorite ensembles. Again a very wearable ensemble with untold amount of hand and beadwork on the jacket and the pants hem.


I also enjoyed perusing the regular quilt sections of the exhibits. There was a wide variety displayed, from very traditional antique quilts to modern day miniatures and my favorite, the wildlife quilts. Quite a few were for sale, although no prices were listed. Of course my very favorite one, which I would have enquired about, was already marked sold! 
My hands down favorite of the quilts!

Those eyes are so full of expression!


Made out of yo-yos!

This was my favorite miniature quilt, only about 12" square! FEED ME!!
The vendor area was mostly quilting supplies and quilting fabric. However there were a couple vendors that had some fun things. I purchased some silk strips to play with as trims. The Wool House was in attendance but had mostly boiled wool and wools that would appeal to quilters so nothing that really enticed me. I did get a new iron and of course a couple little girl dress patterns for my princess.
I also bought a new iron, I really needed one. My rowenta finally gave up. I will do a review of it once I give some use.

As I wandered among the vendors I can upon the Soutache booth! so nice to chat with a familiar face :)

Happy Sewing!!

Hello! Can you hear me now? Oh wait... this is not the phone! it's the TV remote. Silly Girl!